Protect Your Home: Common Fascia Board Problems and How to Spot Them
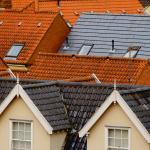
The fascia board is the front-facing trim board that runs horizontally along the roofline of your home.
It might not seem like much, but it plays a crucial role. Not only does it play an important aesthetic role by complementing roof edges, but it also helps protect your roof from moisture damage. Furthermore, according to Belco Forest Products, it supports your gutters and protects the edge of your roof. However, like any exposed wood, fascia is prone to weathering, rot, and pest issues over time.
Knowing how to spot common fascia problems is key to maintaining your home's curb appeal and roof integrity. Catching these issues early will only help you prevent major (and pricier!) repairs down the line. Neglecting seemingly minor fascia issues can lead to expensive repairs down the line. It can cost anywhere from $1,300 to $6,000 or more, depending on the severity of the damage and your choice of materials.
This blog aims to provide you with the basic knowledge to safeguard your home.
What Are Some Common Fascia Board Problems?
Rotting wood is one of the most common issues, often resulting from excess moisture exposure.
If your fascia feels soft or spongy, looks discolored, or gives off a musty smell, you likely have rot. Don't ignore this, as rot will spread and weaken the structural integrity of your home. Moreover, rotten wood can also pose a potential health risk. People with respiratory issues can have their allergies triggered due to the spores secreted by the wet rot.
A warped or saggy appearance can also indicate an issue. Typically, it means your gutters are clogged or overflowing, putting undue weight on the fascia. In severe cases, sagging could even point to issues with your roof structure. Pest damage is another concern.
With climate change creating more favorable conditions for pests, the threat to your fascia is increasing. A UN-backed study found that climate change is making some pests more destructive to some important crops. Carpenter bees and termites may chew through or drill small holes along the fascia. You’ll notice tiny, rounded holes, with wood shavings or dust piles below.
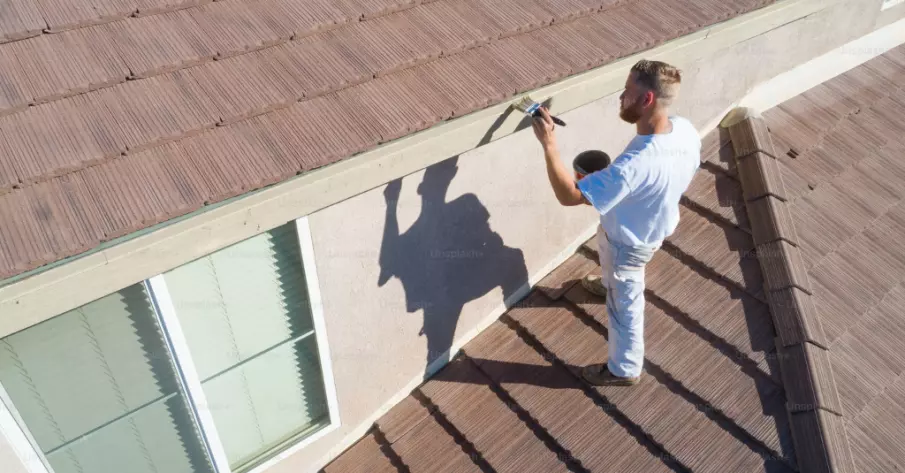
Finally, if the paint is badly chipped or missing in areas, it exposes the wood to moisture. This increases the chance of rot, and warping, and attracts pests. Any bare wood is at risk and needs repainting.
How Can I Inspect My Fascia Board?
The fascia can be difficult to inspect up close since it runs along the roofline. Use binoculars to get a detailed view, especially of hard-to-reach areas.
However, key problem signs will be visible from the ground. Look for sagging sections, gaps between boards, protruding nail heads, and peeling paint. Pay extra attention during and after rainstorms. Damaged areas may show water stains. Check areas with the most sun exposure, as they deteriorate faster. Moreover, tap along the entire length of the fascia when it's dry. You’ll hear a dull thud rather than a sharp tap if the wood is soft or damaged.
For a thorough inspection, carefully stand on a sturdy ladder placed on soft grass or padding. Peer behind the gutters to uncover hidden trouble spots.
When Does My Fascia Board Need Replacement?
If more than 25% of the board is damaged, replacement is usually the best option. If gaps and seams have opened up, allowing water intrusion, a new installation is recommended. Significant rot or pest damage that can’t be repaired will also require replacement.
You should also replace your fascia board if it is badly warped or buckled and cannot be refastened flush to the structure. Any issues that compromise proper function should be addressed promptly.
How is a Fascia Board Replaced?
Installing a new fascia board is manageable as a DIY project if you have carpentry experience. Here is a general overview of the process:
First, remove the existing gutters, fascia board, and any adjacent trim boards that are rotted. Check the sheathing behind the fascia and replace any deteriorated boards to ensure a solid attachment surface.
Cut a new fascia board to the correct length. Use a rot-resistant material, like pressure-treated pine or PVC. Attach it securely to the rafter ends, keeping the board centered and plumb along the roofline. Leave small gaps between the board joints for expansion.
Once attached, apply primer and paint the fascia board to protect it from moisture and sun damage. Use high-quality exterior-grade paint. Finally, rehang the gutters with the proper slope and securely fasten them to the new fascia.
In conclusion, your home is a significant investment, and protecting it should be a top priority. Your fascia board plays an important role in protecting your home from water damage.
By understanding common fascia problems and knowing how to spot them early, you can safeguard your home against costly repairs and structural damage. While regular inspection and prompt repair of any issues often get overlooked, they help maintain your home's curb appeal.
Think of it as preventative medicine for your home–protecting it from water intrusion, pest infestation, and costly repairs further down the line.
More to Read:


Previous Posts: